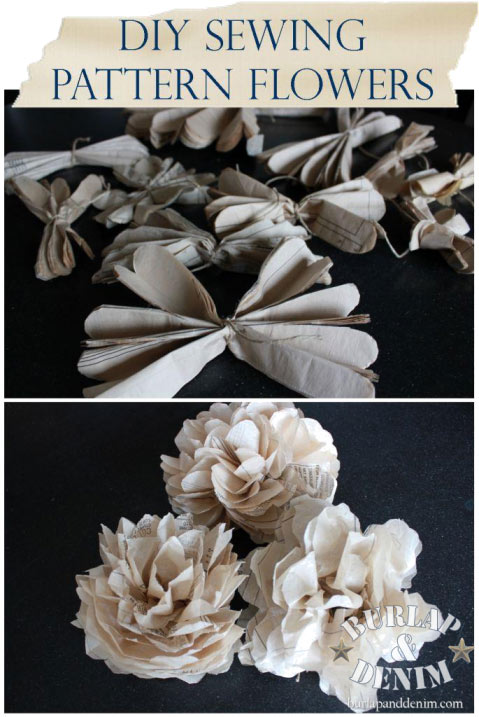
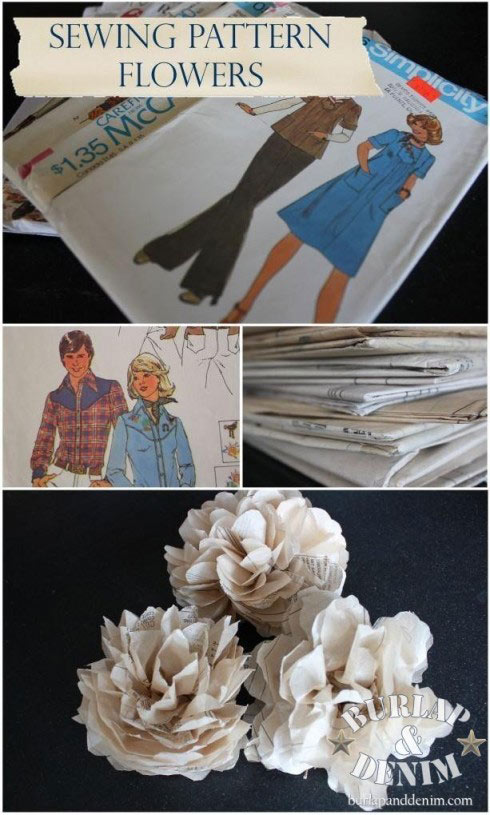
At a recent “Free” yard sale swap that a fellow blogger hosted, I found a stack of atenolol for social anxiety old sewing patterns free for the taking. The images on the covers were priceless, and I knew I could create something with this bit of nostalgia.
I’ve seen patterns used in many ways recently, but my favorite were tissue paper flowers. After searching for the perfect tutorial, I decided to make one myself and include all the important details that I felt others had left out and I had to learn by trial and error.
How to Make Tissue Paper Flowers: Step by Stype
1. Layer the tissue paper. For smalls I used 7-9 layers, for larges I used 11-14 sheets. If your patterns are all ready used and cut, this is more difficult because you have to layer similar sizes and this turned out to be the largest time consumer. Conversely, if you have brand new unused patterns, the flowers are really easy and quick (mine were about 50/50).
2. Trim off any excess. I made all of them a slight rectangle with an approximate 3X4 ratio.
3. Admire your crisp edges because they are very important.
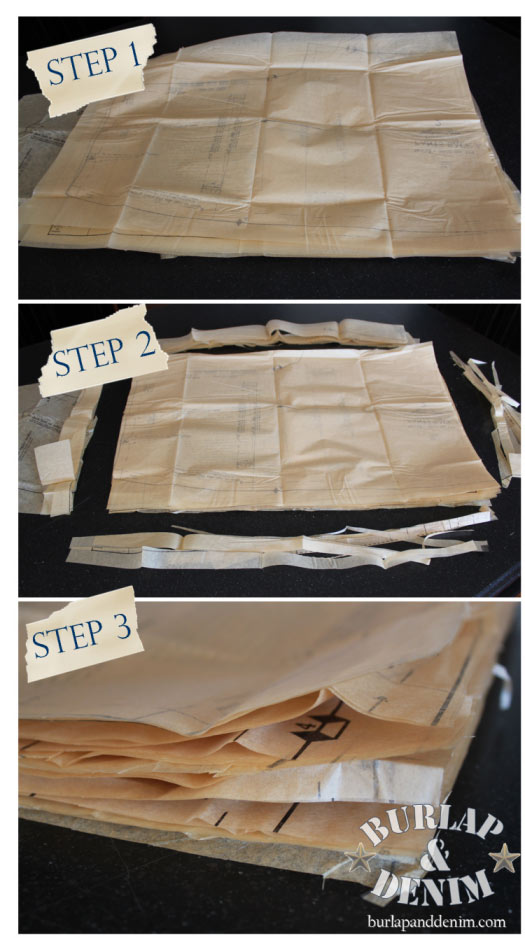
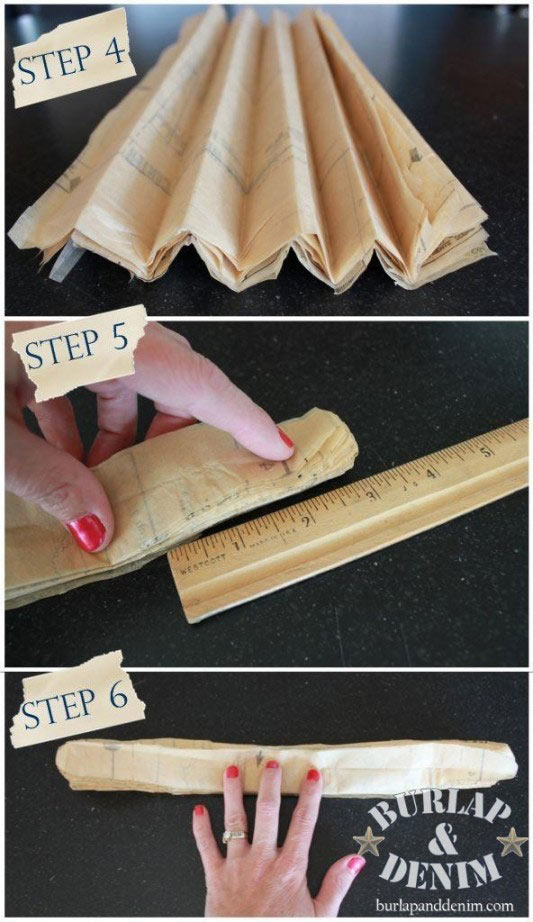
4. Fold the paper as neatly as possible into a fan lengthwise.
5. Trim the end of the fan into the desired petal shape (further details later). This one was trimmed about 3 inches all the way around.
6. Repeat on the other end trying to make them match as close as possible.
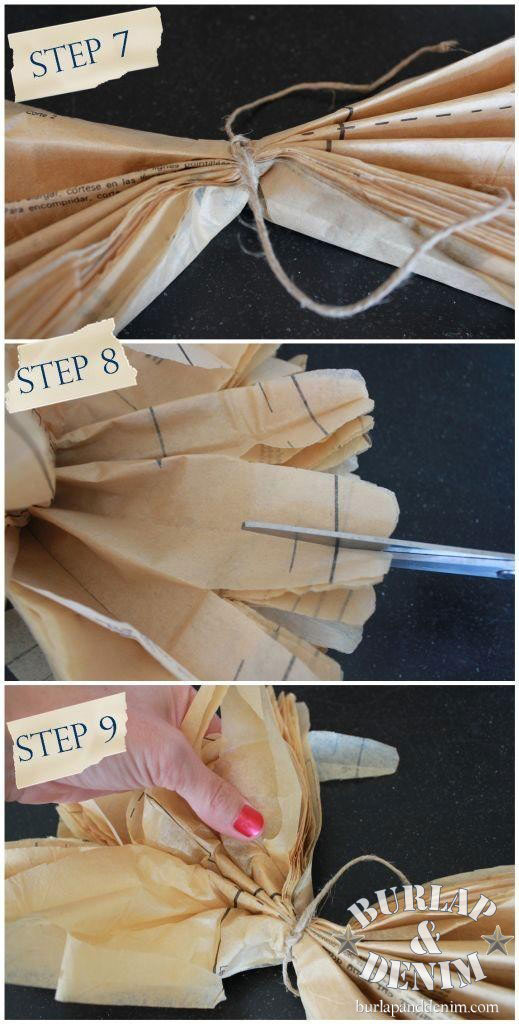
7. Tie the center of the fan with twine and pull tight.
8. Trim up any leaf formations that didn’t get cut all the way (especially when working with many layers of tissue paper).
9. Separate the fan at the base of the twine. Round it up like a bowl.
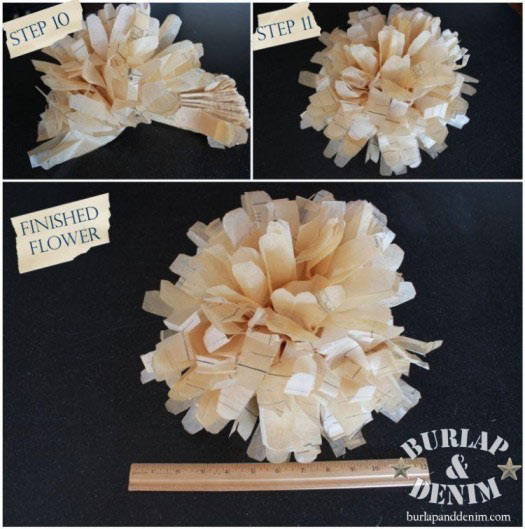
10. Carefully separate one layer at a time starting in the center.Pull it straight up being care full not to tear the tissue (this didn’t happen often, maybe 3 layers out of 30 or so flowers). Continue one layer at a time until that side is completely separated.
11. Repeat on the other side.
Fluff and enjoy. This image has a ruler by it to show the size of this flower. It turns out that the length of the paper (and fan) ends up about the width of the finished flower. My flowers varied from 4-15 inches.
I tried many different edges to create many different looks for the flowers. I labeled them flower names that they looked most like to me.
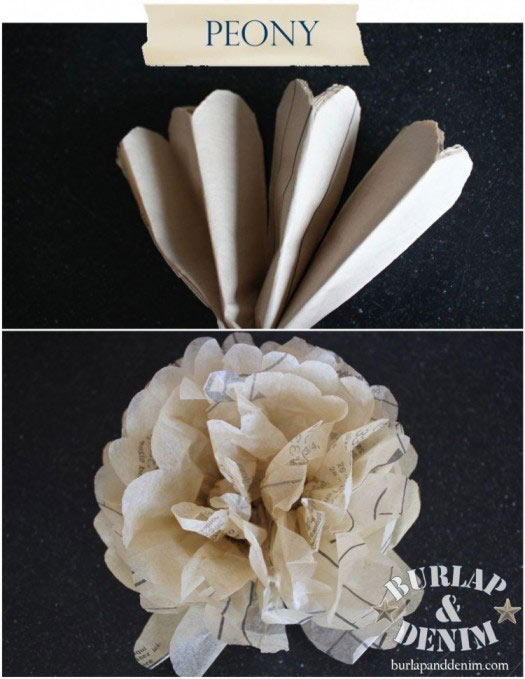
The Peony. For this design I rounded the ends and then cut a deep V in every other crease. Because of the organic nature of these flowers, it doesn’t matter if some have two and others have three segments.
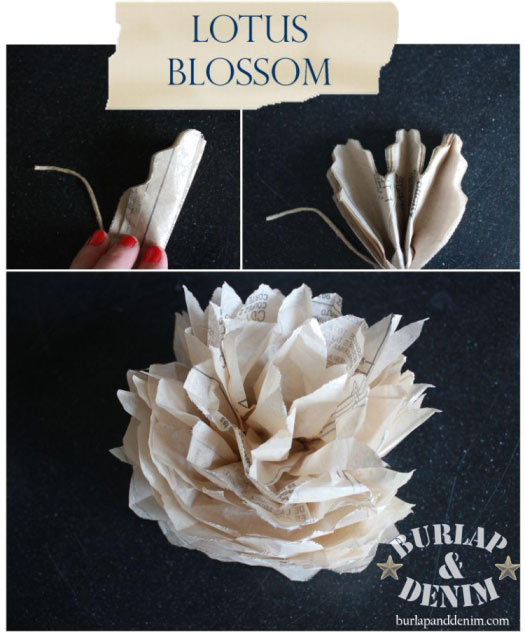
The Lotus Blossom. For this flower I wanted the tips to have a little bit of a point. I scalloped ONE side of the end of the fan. This one does work out better if it is symmetrically folded; this one has 5 folds forming 3 petals.
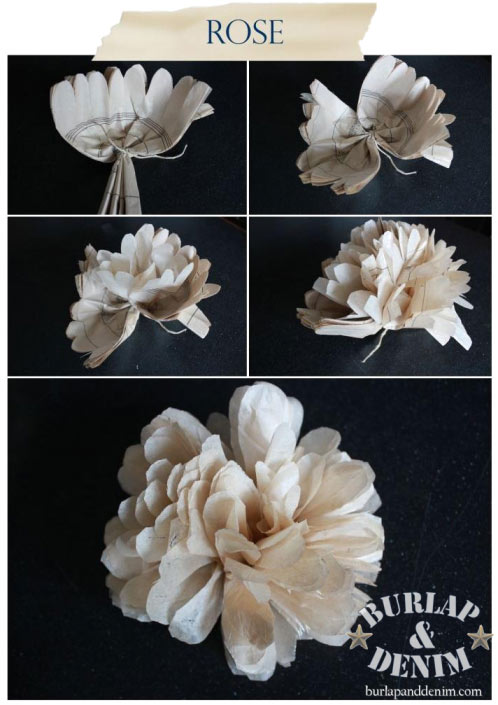
The Rose. This reminds me of a double blooming rose, my favorite kind. Simply round the edges of the ends of the fan as symmetrically as you can. Sometimes I would clean up the edges once I opened it into the bowl shape. In another variation I cut the rounded bowl in half almost to the twine making 4 equal sections to separate.
Take my layouts as a starting point and be creative! These are so fun and organic, especially considering the natural color range of the patterns themselves. Some are a caramel color while others are more linen.